一、安装Rust
访问官网下载安装包 Rust官网
安装程序不支持自定义安装目录,如果需要的话,在安装之前添加以下两个 用户变量
| 名称 | 内容 |
|---|---|
| RUSTUP_HOME | rustup目录 |
| CARGO_HOME | cargo目录 |
启动安装程序
Current installation options:


   default host triple: x86_64-pc-windows-msvc
     default toolchain: stable (default)
               profile: default
  modify PATH variable: yes

1) Proceed with standard installation (default - just press enter)
2) Customize installation
3) Cancel installation
>
直接输入1回车跟随安装完成即可。
二、设置镜像源
在cargo目录(默认为C:\Users\xxxx\.cargo)下创建一个无后缀名的文件 config ,配置以下内容
[source.crates-io]
registry = "https://github.com/rust-lang/crates.io-index"
replace-with = 'ustc'

[source.ustc]
registry = "git://mirrors.ustc.edu.cn/crates.io-index"
三、vscode插件安装

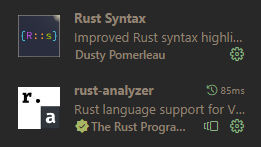
安装 Rust Syntax 和 rust-analyzer 两个插件。
四、新建工程以及配置调试
1. 创建工程
cargo new 工程名
2. 创建运行任务
在vscode中打开工程后
终端 > 运行任务 > 配置任务 > 使用模板生成task.json文件 > others 会在工程目录下生成 .vscode\task.json 文件
参考配置如下
{
    // See https://go.microsoft.com/fwlink/?LinkId=733558
    // for the documentation about the tasks.json format
    "version": "2.0.0",
    "tasks": [
        {
            "label": "build debug",
            "type": "shell",
            "command": "cargo",
            "args": ["build"]
        },
        {
            "label": "build release",
            "type": "shell",
            "command": "cargo",
            "args": ["build --release"]
        }
    ]
}
3. 创建运行和调试配置
点击vscode左侧 运行和调试 页面,点击 运行 按钮,会在工程目录下生成 .vscode\launch.json 文件
参考配置如下
{
    // 使用 IntelliSense 了解相关属性。
    // 悬停以查看现有属性的描述。
    // 欲了解更多信息,请访问: https://go.microsoft.com/fwlink/?linkid=830387
    "version": "0.2.0",
    "configurations": [
        {
            "name": "(Windows) 启动",
            "preLaunchTask": "build debug",
            "type": "cppvsdbg",
            "request": "launch",
            "program": "${workspaceFolder}/target/debug/${workspaceFolderBasename}.exe",
            "args": [],
            "stopAtEntry": false,
            "cwd": "${workspaceFolder}",
            "environment": [],
            "console": "integratedTerminal"
        }
    ]
}
注意 preLaunchTask 就是上面 运行任务 中的 label


Comments NOTHING